Affordable Chart Plotter Setup Using Raspberry Pi and Open Plotter Software
Hey, sailor! In this post, we'll walk you through the process of installing Open Plotter on a Raspberry Pi for marine navigation and AIS using a USB TV tuner. Basically, we're going to add a Brain to your boat!
With the Raspberry Pi, we'll create a highly advanced and extremely affordable chart plotter for your watercraft, as well as add an AIS system to see nearby vessels in real-time with a simple USB TV tuner.
Let's kick things off with some basics
Some of you may have heard of the Raspberry Pi or Open Plotter, but for others, these terms might be under the radar.
The Raspberry Pi is essentially a compact, affordable, and surprisingly powerful computer. For instance, the Raspberry Pi 4, which we'll be using, costs just €50.
Given its affordability, numerous projects have emerged aimed at utilizing the Raspberry Pi in all sorts of creative ways, from turning it into a smart TV to becoming a retro gaming console, and even doubling as a boat's brain – similar to what we're about to do!
Enter Open Plotter, a Linux-based operating system designed specifically for the Raspberry Pi, which brings together a plethora of handy utilities and programs for sailors.
So, what's in it for us?
With the Raspberry Pi, Open Plotter, and some additional accessories, we'll be able to do a whole lot:
- Chart plotter: By plugging in a USB GPS, we'll be able to use it as a satellite-based chart plotter for your boat.
- AIS receiver: By tweaking a simple USB TV tuner, we'll convert it into an AIS receiver to see nearby ships in real-time, with their courses and speeds.
- Integration of meteorological data: We can download the latest weather forecasts and overlay them on our boat's charts for optimal navigation.
- Compatibility with other instruments: The system can effortlessly connect with existing instruments on your boat, such as sounders or wind sensors, and display all information on your preferred device.
- Wi-Fi capabilities: The system also has Wi-Fi capabilities, ensuring that all data is readily available on your tablet or smartphone.
- Camera access: The system can even be used to view your boat's cameras on a TV or screen.
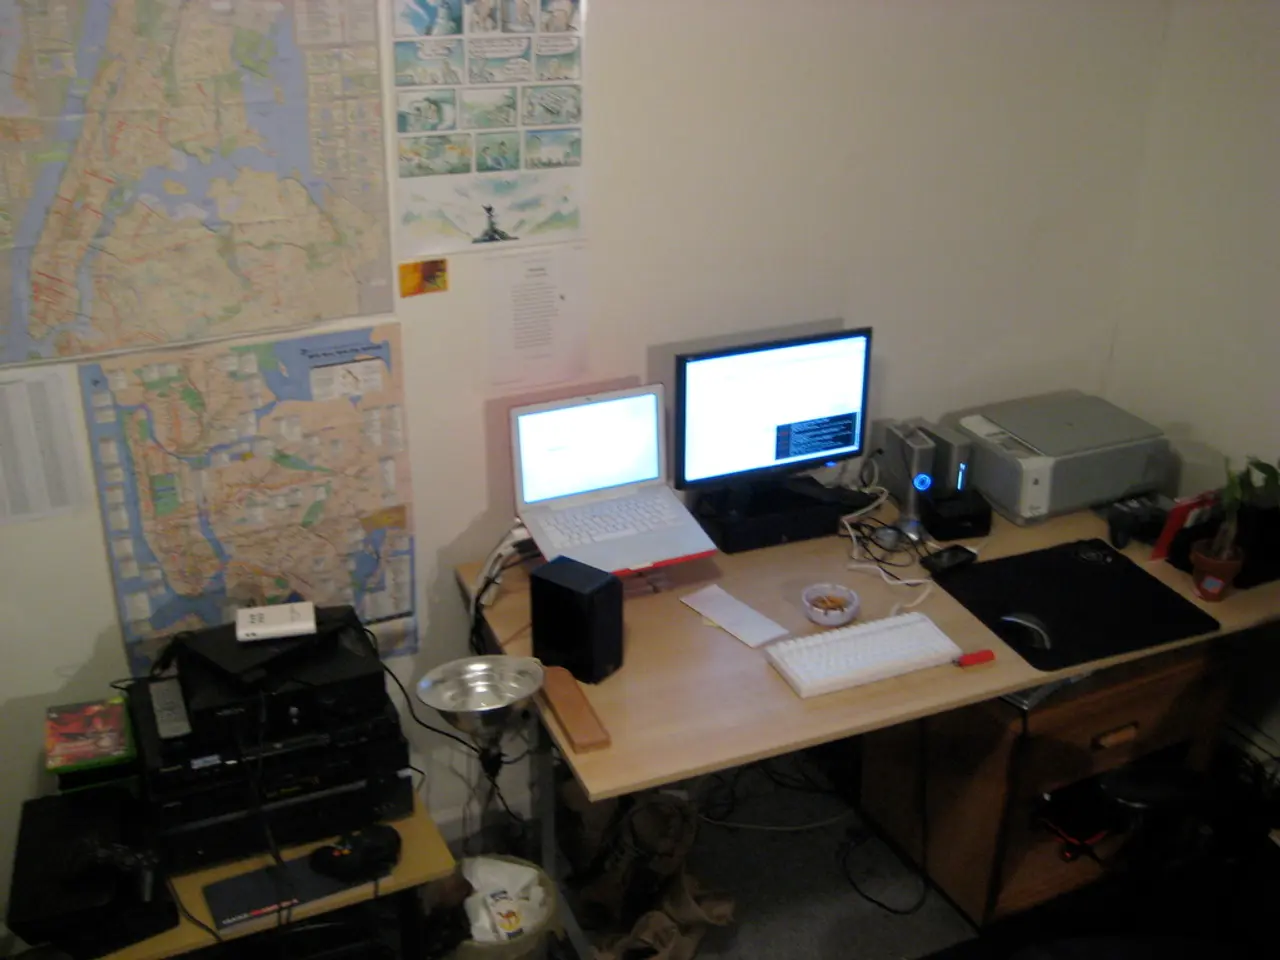
Mounting Options
We'll be looking at two mounting options for our plotter and AIS setup:
- System without a screen or connected to a TV screen
- All-in-one option with a built-in touchscreen
Shopping List
Here's what you'll need for each setup, available both for the Raspberry Pi 4 and Raspberry Pi 5:
For both options:- Raspberry Pi 4: AliExpress | Amazon- Raspberry Pi 5: AliExpress | Amazon- Micro SD memory card (64GB): AliExpress | Amazon- USB TV tuner: AliExpress | Amazon- 12V power supply socket: AliExpress | Amazon- USB 5V 3A charger: AliExpress | Amazon- Power supply cable (USB-C): AliExpress | Amazon
For the option without a screen or connected to a TV screen- GPS USB: AliExpress | Amazon- HDMI cable (Micro HDMI to HDMI): AliExpress | Amazon- Mini keyboard with touchpad: AliExpress | Amazon- Raspberry Pi case: AliExpress | Amazon
For the all-in-one option- GPS USB with integrated antenna: AliExpress | Amazon- Touch screen case: AliExpress | Amazon
Connection guide
Regardless of which setup you choose, installation and configuration will be identical.
If using a TV from the boat:
- Slot the Raspberry Pi into the case you got (you can add heatsinks and a fan to keep it cool).
- Connect your USB GPS to the USB port, the TV tuner to another, and the HDMI to your TV.
- Attach a mini USB keyboard with touchpad for easier setup.
- Power up the system using a USB 5V charger.
If you've opted for the all-in-one option:
- Slot the Raspberry Pi into its all-in-one case with touch screen.
- Connect the GPS, TV tuner, and power supply as in the previous setup.
- The keyboard is optional for the all-in-one setup, as the touch screen serves the same purpose.
Startup
- Download the Open Plotter image to the microSD card by inserting it into your computer and using a tool such as Raspberry Pi Imager or Balena Etcher.
- Install the Raspberry Pi Imager on your computer if you haven't already.
- Install the Open Plotter image on the microSD card.
Setup
- Insert the microSD card into the Raspberry Pi.
- Power up the system, and it will guide you through the initial configuration process, such as choosing your country, time zone, and language, as well as configuring your Wi-Fi if necessary.
- Connect a USB GPS to the Raspberry Pi and, in the Open Plotter menu, configure the GPS settings.
- Download charts for your navigation area (e.g., from https://www.o-charts.org/).
- Add the downloaded charts to OpenCPN by including the folder in the chart directories.
- Connect the TV tuner, add the SDR VHF plugin to Open Plotter, and calibrate the tuner within the Open Plotter interface.
- Activate the AIS module in the Open Plotter interface.
And voila! With these steps, you'll be able to see your boat's position on charts and the vessels surrounding you.
For more detailed walkthroughs, check out videos such as "Openplotter, Raspberry Pi, Signal K & OpenCPN – Part 1." Happy sailing!
In this endeavor, we'll harness the power of technology by utilizing gadgets such as the USB TV tuner and navigation tools like the GPS to transform the Raspberry Pi into a marine navigation system with AIS, elevating it from just a boat's brain to a comprehensive chart plotter and AIS receiver. As we progress through the installation process, we'll also explore the integration of meteorological data, Wi-Fi capabilities, and camera access, enhancing our system's versatility and practicality.


